
We can support MySQL databases thanks to the dump files that contain the entire structure of our database including the records, here I leave a tutorial to perform backups and restore complete databases in C #.
For this we will require a library called MySqlBackup.Net that we can download from its official repository on GitHub following this link, once downloaded we will add the references to MySqlData and MySqlBackup to our project.
Backup the database
Compared to my previous tutorial to backup MySQL databases from Java, this library makes this task easier because it is enough to use our same connection to our database and the name or path of the final file, so that it generates a full dump of our database.
We will encode the backup method of our database, for that I will use a separate class, where I have my connection to my database and I only create a method called
backup (string path)
, where the path is the directory where will keep my dump, the code will be the following:
1 2 3 4 5 6 7 8 | public void backup (string path){ using (MySqlCommand cmd = new MySqlCommand()){ using (MySqlBackup mb = new MySqlBackup(cmd)){ cmd.Connection = SQLConnection(); mb.ExportToFile(path); } } } |
At the end, the program generates the dump file in the path that we specify or in the same directory with the name that we have specified.
Restore database
Similarly to restore our database from the dump file we will create a method called
restore (string path)
where path is the directory of our dump file, the code would be as follows, note that I add the code in my same class database.cs.
1 2 3 4 5 6 7 8 | public void restore(string path){ using (MySqlCommand cmd = new MySqlCommand()){ using (MySqlBackup mb = new MySqlBackup(cmd)){ cmd.Connection = SQLConnection(); mb.ImportFromFile(path); } } } |
The restoration process can be a bit slow, depending on how big your database is and how many records exist in it.
At the end my
database.cs
class will be as follows:
1 2 3 4 5 6 7 8 9 10 11 12 13 14 15 16 17 18 19 20 21 22 23 24 25 26 27 28 29 30 31 32 33 34 35 36 37 38 | public class database{ public MySqlConnection SQLConnection(){ MySqlConnectionStringBuilder sb = new MySqlConnectionStringBuilder(); sb.Server = “localhost”; sb.Database = “pruebas”; sb.UserID = “root”; sb.Password = “2362”; //sb.SslMode = MySqlSslMode.None; MySqlConnection conn = new MySqlConnection(sb.ToString()); conn.Open(); return conn; } /// <summary> /// Metodo para generar un volcado de una base de datos MySQL /// </summary> /// <param name=”ruta”> La ruta a donde se almacenara el archivo .sql</param> public void respaldo (string ruta){ using (MySqlCommand cmd = new MySqlCommand()){ using (MySqlBackup mb = new MySqlBackup(cmd)){ cmd.Connection = SQLConnection(); mb.ExportToFile(ruta); } } } /// <summary> /// Metodo para restaurar una base de datos desde un archivo de volcado /// </summary> /// <param name=”ruta”> La ruta del archivo de volcado .sql</param> public void restaurar(string ruta){ using (MySqlCommand cmd = new MySqlCommand()){ using (MySqlBackup mb = new MySqlBackup(cmd)){ cmd.Connection = SQLConnection(); mb.ImportFromFile(ruta); } } } } |
To finish you just have to create an instance of our class and call our methods, I would recommend using an
OpenFileDialog
and a
SaveFileDialog
for the selection and saving of data as I did in the sample program that you can download.
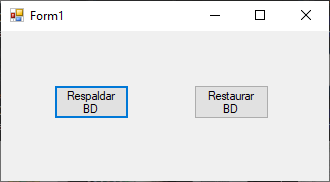
Source code
You can download a sample project made with WinForms, to use it just change the data with those of your database in the database.cs class.
Remember to download the libraries and add them to the project to make it work.
As you have just seen, backing up MySQL databases is easier to do thanks to this library.
you have doubts? Please comment we will try to give you a solution and remember to activate the notifications of this blog to receive more tutorials.
Leave a Reply